
It should not be this hard to find the answer to a simple problem.
So I printed Tiny Planetary Gears Set http://www.thingiverse.com/thing:23030 and during assembly I broke one of the pieces. The beauty of a 3dprinter is I can just print another one right? Right! Well with a snag. Things from the http://www.thingiverse.com come in .stl format which is a final solid object even though most of the files out there are multiple object put together for convenience. So I just wanted to print one part out of many:
This is how the .stl file looks from the Thingiverse
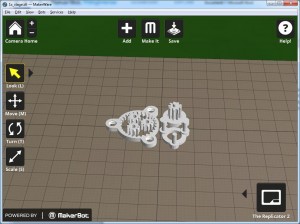
Origional STL
But I want just one piece from this not the whole thing. This seem deceptively simple but praying to the google gods, it was a hard won solution and that is why I am sharing.
First of all go download and install http://www.netfabb.com/download.php it has a free (basic) version that will do just fine.
-
- Open the .stl by going to Project->Add Part
- Browse to the file an click open
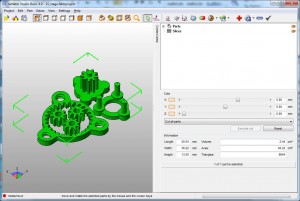
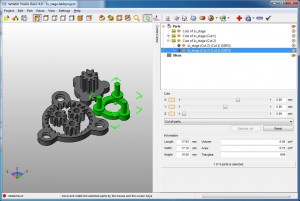
- Now on the right side of the screen you will see cuts configuration. Start by slicing in the X direction using the slider bar for X. Pay close attention to the red intersects that appear as you move the slider.
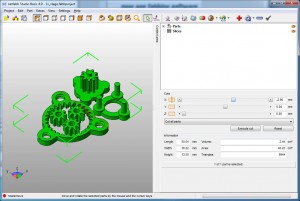
- Select a spot that has no intersections and click Execute cut.
- Then click Cut
- Now notice that you can expand Parts in the context area and select the individual halves you just made.
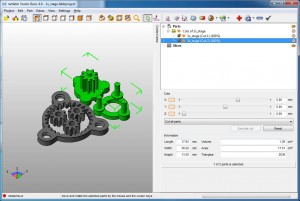
Select the new object
- I want to slice again to get just one of these items so I am going to use the Y slider to split it again.
- Move the Y slider so there are no intersections then click Execute Cut and then Cut.
- Now I can select just the one part I want.
Now I have just the part I want
- Ok great! Now lets print it. Right click on the part and select Export part->as STL
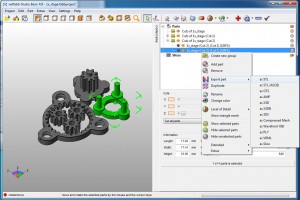
Export it
- Give it a name and click save
- Now we can open it with MakerWare and print it.

Let print it
That wasn’t so hard after all why did it take so long to find the answer? Who knows? Hopefully this saves someone the several hours (and downloading several programs) it took me looking for the answer.